Installing solar panels on your roof can significantly reduce your energy bills and carbon footprint. Learning how to install solar panels on roof empowers homeowners to take control of their energy consumption while contributing positively to the environment. This guide will walk you through each step, ensuring you have the knowledge and confidence to undertake this project.
Before diving into the installation process, it’s essential to understand the advantages and disadvantages as well as necessary preparation. From assessing your roof’s condition to selecting the right equipment, each step plays a crucial role in the success of your solar installation. This guide will cover these details and more, giving you a solid foundation for a successful solar panel installation project.
Benefits of How to Install Solar Panels on Your Roof
Understanding how to install solar panels on your roof can save you money and increase your property value. DIY solar installation tips not only help reduce your energy bill but also offer a sense of accomplishment. You gain valuable skills and knowledge in the process, which can be beneficial for future projects.
Moreover, the DIY approach provides insight into the workings of solar systems. This understanding enables you to make informed decisions about maintenance and potential upgrades. Additionally, installing your own solar panels can lead to significant cost savings compared to hiring professionals.
By taking on this project, you also have the opportunity to tailor the installation to your specific needs and preferences. Whether you prioritize aesthetics or maximize energy production, your involvement ensures the final result aligns with your goals. These benefits collectively make learning how to install solar panels on your roof a worthwhile endeavor.
Assessing Your Roof Preparation for Solar Installation
Proper roof preparation for solar is a critical step in the installation process. Before you begin, evaluate your roof’s strength and condition to ensure it can support the weight of solar panels.
Evaluating Roof Strength and Condition
Assessing your roof’s strength and condition involves inspecting for signs of wear and tear. Look for loose or missing shingles, cracks, and any areas of weakness. Addressing these issues beforehand can prevent future problems and prolong the life of your solar installation.
Consider hiring a professional roofer to conduct a thorough inspection. They can provide an expert opinion and suggest necessary repairs. Ensuring your roof is in optimal condition will provide a stable foundation for your solar panels, reducing the risk of damage.
Analyzing Roof Angle and Orientation
The angle and orientation of your roof significantly impact solar energy production. Ideally, solar panels should face south in the northern hemisphere for maximum sunlight exposure. If your roof doesn’t face south, consider the available space and the possibility of installing panels on different sections.
The roof angle also affects energy efficiency. A slope between 30 and 45 degrees is considered optimal for most locations. If your roof’s angle isn’t ideal, mounting systems can adjust the panel angle to improve efficiency.
Checking for Shade and Sunlight Exposure
Shade from nearby trees, buildings, or chimneys can affect solar panel performance. To maximize energy production, identify and mitigate any potential shading issues. Trim overhanging branches or consider removing obstacles if possible.
Conduct a sunlight exposure analysis to determine the best spots for panel placement. Tools like solar pathfinders or online mapping services can assist in assessing sunlight availability throughout the year. This step ensures your solar panels receive maximum sunlight, optimizing energy output.
Essential Tools and Equipment for DIY Solar Installation Tips
Having the right tools and equipment is crucial for a successful DIY solar installation. Select the appropriate solar panel type, safety gear, and work area setup.
Selecting the Right Solar Panel Type
Solar panels come in various types, including monocrystalline, polycrystalline, and thin-film. Monocrystalline panels offer high efficiency and durability, making them a popular choice for residential installations. Polycrystalline panels are more affordable but slightly less efficient.
Thin-film panels are flexible and lightweight, ideal for certain roof types. Evaluate your energy needs, budget, and roof space to choose the best panel type for your installation. This decision impacts the overall efficiency and longevity of your solar system.
Necessary Safety Gear and Precautions
Safety is paramount during any DIY project. Equip yourself with essential safety gear, including gloves, goggles, and a safety harness. A hard hat is also advisable when working on a roof.
Follow all safety protocols to prevent accidents. Ensure your ladder is stable and secure, and avoid working in wet or windy conditions. By prioritizing safety, you can complete your solar installation without injury or damage.
Preparing Your Work Area Safely
Prepare your work area by clearing debris and securing loose materials. Organize your tools and equipment for easy access, and ensure your workspace is safe and clutter-free. This preparation minimizes risks and allows you to focus on the installation process.
Consider using temporary safety barriers or warning signs to alert others of the work area. This step further enhances safety, especially if you live in a busy neighborhood or share the space with others.
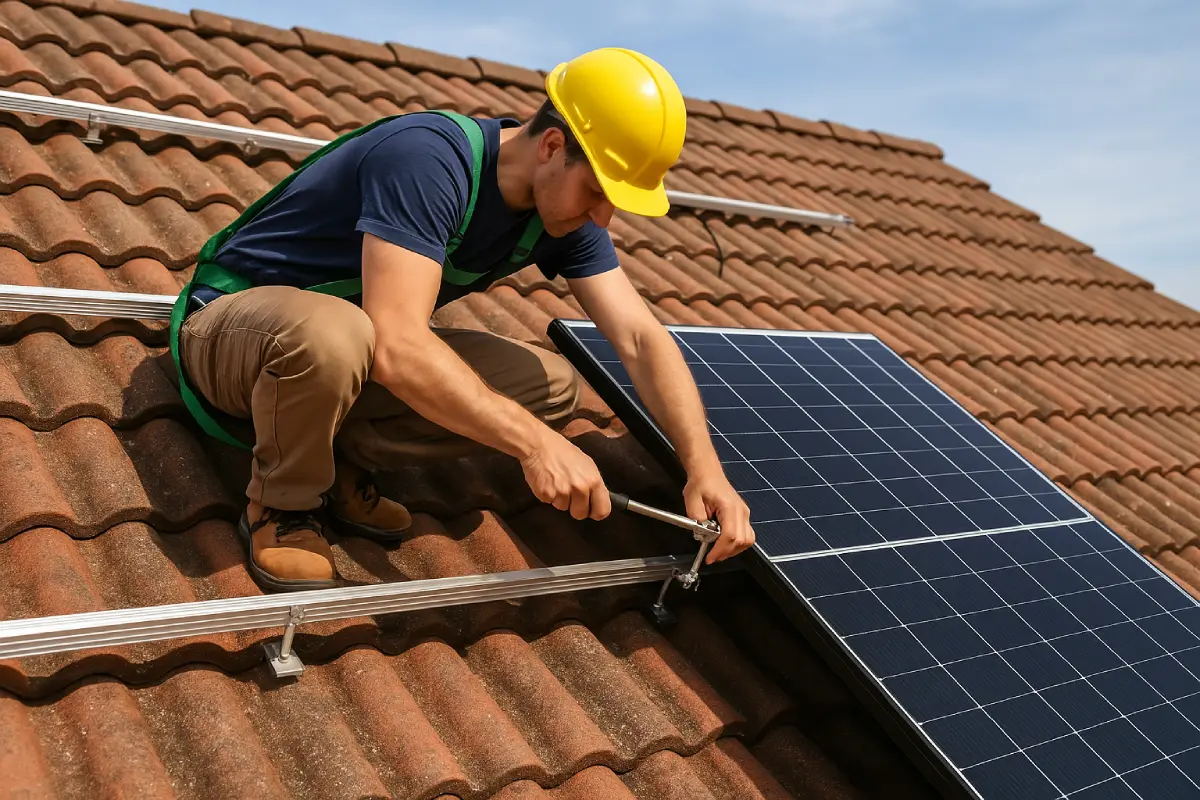
Step-by-Step Guide for Safe Solar Mounting
Safe solar mounting involves several key steps, from installing brackets to attaching panels securely. Each phase is crucial for ensuring stability and efficiency.
Installing Mounting Brackets and Rails
Begin by installing the mounting brackets. These brackets anchor the solar panels to your roof securely. Space them evenly across your roof, following the manufacturer’s guidelines for optimal support.
Once the brackets are in place, attach the rails. The rails hold the panels and ensure they remain in position. Use a level to confirm the rails are perfectly horizontal, which is essential for alignment and stability.
Waterproofing and Leak Prevention Techniques
Waterproofing is crucial to prevent leaks and protect your roof. Use flashing and sealant around the brackets and any roof penetrations. This step creates a watertight seal, safeguarding your home from water damage.
Apply additional sealant around the rails and any other vulnerable areas. Inspect the waterproofing measures regularly to maintain their effectiveness and address any issues promptly.
Securely Attaching Solar Panels to Your Roof
With brackets and rails in place, secure the solar panels onto the rails. Carefully lift each panel and align it with the rails, fastening them with appropriate hardware. Ensure each panel is firmly attached and check for any loose connections.
Double-check the alignment and spacing of your panels. Consistent spacing ensures even weight distribution and enhances the overall aesthetics of your installation.
Understanding Wiring and Inverters in Solar Installations
Wiring and inverters are vital components of your solar system. Proper installation ensures your system operates safely and efficiently.
Connecting Panels Safely and Efficiently
Connect the panels using MC4 connectors, designed for outdoor use. These connectors ensure a secure and weatherproof connection between panels. Follow the manufacturer’s instructions for safe and efficient wiring.
Route the wiring to avoid sharp edges or areas prone to damage. Use conduit to protect the wires and maintain a clean and organized appearance.
Choosing the Right Solar Inverter
The inverter converts the DC power generated by your solar panels into AC power used by your home. Choose a solar inverter that matches your energy needs and system specifications. Options include string inverters, microinverters, and power optimizers.
String inverters are cost-effective and suitable for simple installations. Microinverters offer greater efficiency and flexibility, while power optimizers maximize energy production in systems with shading issues.
Grounding and Electrical Safety Considerations
Proper grounding is essential for electrical safety. It protects your system from electrical faults and reduces the risk of injury. Follow the manufacturer’s guidelines for grounding procedures, and consult a licensed electrician if needed.
Regularly inspect your system’s electrical components for wear or damage. Ensure all connections are secure and free from corrosion. These steps maintain the safety and performance of your solar installation.
Common Mistakes in DIY Solar Installation Tips
Avoiding common mistakes can prevent unnecessary complications during your solar installation project. Thorough planning and attention to detail are key.
One frequent error is underestimating the complexity of the installation process. Proper research and preparation are essential, including understanding how to install solar panels on roof and related systems. Skipping this step can lead to mistakes and unsatisfactory results.
Improper alignment and spacing of panels is another common issue. Ensuring correct placement optimizes efficiency and stability. Regularly check your progress and make adjustments as needed to achieve the best possible outcome.
Inspecting and Testing Your Solar Installation
Once the installation is complete, inspect and test the system to ensure it functions correctly. This step verifies the integrity and performance of your solar setup.
Begin with a visual inspection of each component. Check for loose connections, damaged wires, and any signs of wear. Address any issues promptly to prevent potential problems.
Test the system by monitoring energy output and comparing it to expected levels. This data provides insight into the system’s performance and helps identify areas for improvement. Regular testing ensures your solar installation operates at peak efficiency.
Maintenance Tips for Long-Term Performance
Proper maintenance extends the life of your solar system and maximizes its energy production.
Routine Cleaning and Inspection Practices
Routine panel cleaning and inspection are vital for maintaining optimal performance. Dust and debris can accumulate on panels, reducing efficiency. Clean panels regularly with a soft brush or water to remove dirt and grime.
Inspect the panels and mounting components for signs of wear or damage. Address any issues promptly to prevent further complications. Consistent maintenance keeps your system in top condition and extends its lifespan.
Troubleshooting Common Installation Issues
Troubleshooting is an essential skill for solar system owners. Identifying and addressing common issues ensures your system remains efficient and reliable.
Monitor your system for irregularities in energy output or unusual noises. These signs may indicate underlying problems needing attention. Consult your installation guide or contact a professional if necessary.
When to Consult a Professional Installer
While DIY projects are rewarding, some situations may require professional assistance. Consult a professional if you encounter complex electrical issues or structural concerns beyond your expertise.
A qualified installer can provide expert guidance and perform necessary repairs or adjustments. This collaboration ensures your solar system operates safely and efficiently.
Understanding Permits and Regulations
Navigating permits and regulations is a crucial aspect of solar installation. Understanding local requirements prevents legal issues and ensures compliance.
Navigating Local Solar Installation Requirements
Research local building codes and permit requirements before starting your project. Contact your local building authority for guidance on necessary permits and inspections. Compliance with these regulations is essential for a successful installation.
Understanding the permitting process can also expedite your project timeline. Familiarize yourself with the paperwork and approval process to minimize delays and ensure a smooth installation experience.
Safety Reminder
Remember to prioritize safety, thorough planning, and attention to detail throughout the process. These elements ensure a successful installation and long-lasting performance. Whether you’re a seasoned DIY enthusiast or a beginner, this guide provides the tools and knowledge needed for a successful solar installation.
FAQs About How to Install Solar Panels on a Roof
Can you install your own solar panels on your roof?
Yes, you can install your own rooftop solar panel system, but it’s usually recommended to hire a certified solar installer. A solar company ensures the solar panel mounts are secure and that your solar panels perform efficiently.
How do you install solar panels on a roof?
To install solar panels on a roof, solar panel mounts are first attached securely, then the solar panels are installed on top. A professional solar installer or solar company typically ensures proper alignment and wiring for optimal performance.
What is the biggest drawback of solar panels?
The biggest drawback of a solar panel system is the upfront cost, especially without incentives. However, according to the National Renewable Energy Laboratory, long-term savings on how much electricity you use can outweigh the initial expense.
How many solar panels to run a 2000 sq ft house?
A 2000 sq ft house generally needs 16–25 solar panels installed, depending on energy usage and panel efficiency. A solar company or solar installer can assess how much electricity your home consumes to size the rooftop solar system accurately.
Can I buy solar panels and install them myself?
Yes, you can buy and install a solar panel system yourself, but it’s not always advised unless you’re experienced. A certified solar installer ensures safety, proper solar panel mounts, and that the solar panels perform efficiently.
How much does a solar roof cost?
The cost of a solar roof varies, but averages between $15,000 and $40,000 depending on the size of the solar panel system. Getting quotes from a solar company or checking with the National Renewable Energy Laboratory can give better cost estimates.
How much money do solar panels save per month?
Solar panels can save homeowners $50 to $150 per month, depending on how much electricity is used and local utility rates. A well-sized rooftop solar panel system installed by a solar installer maximizes monthly savings.
Do solar panels work in winter?
Yes, solar panels perform in winter, although shorter days and snow may reduce output. A solar company can optimize your solar panel system to ensure rooftop solar remains effective year-round.
How do I prepare my roof for solar panels?
To prepare your roof, ensure it’s in good condition and can support solar panel mounts. A solar installer will inspect it and confirm it’s ready for a rooftop solar panel system.