Roof drip edge types have become a crucial component of modern construction, with most building codes across North America now requiring their installation to protect homes from water damage. These L-shaped metal sheets, installed at the roof’s edge, serve as an essential barrier that directs water away from the fascia and into the gutters.
While the concept might seem simple, choosing between different types of roof drip edge can significantly impact a home’s protection. From affordable aluminum options at $0.30 per linear foot to premium copper installations costing up to $15 per linear foot, each material and profile serves specific purposes. In fact, organizations like the Asphalt Roofing Manufacturers Association recommend specific drip edge roof flashing types based on their effectiveness at water diversion.
For homes with a traditional overhang roof design, the drip edge becomes even more crucial as it manages the natural flow of water away from the building. This guide explores various metal roof drip edge types, flat roof drip edge types, and everything homeowners need to know to make an informed decision for their roofing system.
Roof Drip Edge Types and Their Functions
The essential components of proper roof protection often go unnoticed until problems arise. Roof drip edge types serve as the first line of defense for your home, representing more than just a small strip of metal at your roof’s perimeter. These seemingly minor elements play a major role in extending your roof’s lifespan and preventing costly water damage.
What is a drip edge and why it matters
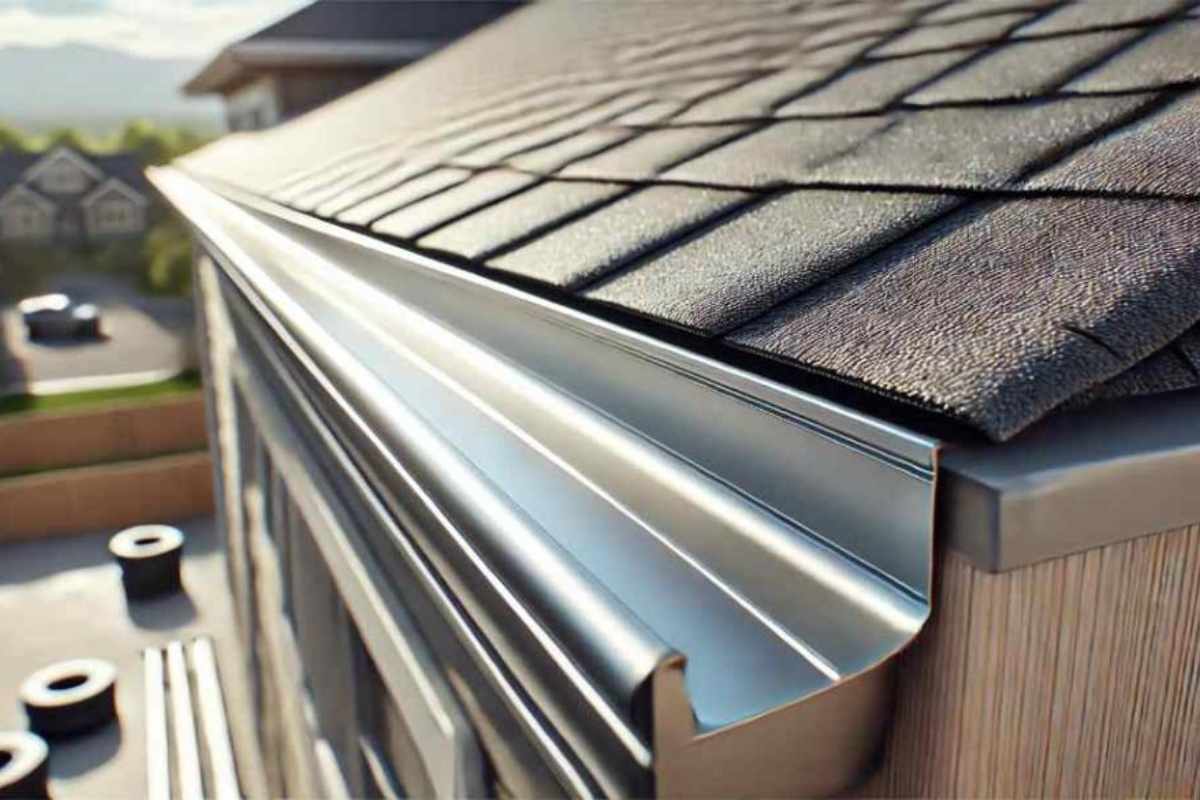
A drip edge is an angled piece of metal flashing installed at the edge of your roof. It attaches to the roof deck and extends out over the fascia boards, which are the horizontal boards located under the roof’s eaves. Most contemporary building codes now require drip edge flashing as part of a roofing system, recognizing its critical importance to roof integrity.
The primary function of various roof drip edge types is straightforward yet vital – preventing moisture from getting underneath the row of shingles closest to the eaves and directing water away from the fascia and into the gutter. Without this barrier, rainwater can easily drip behind gutters and run down the fascia into soffit boards, causing significant water damage regardless of your roof type.
Additionally, drip edges seal gaps between the roof edge and fascia, creating a barrier against insects and other pests that might otherwise make homes in these tight crevices. They also help prevent the formation of ice dams by ensuring proper water flow, especially important in colder climates.
How drip edges protect your roof structure
Different drip edge roof flashing types provide multiple layers of protection for your roofing system. First, they prevent wind-driven rain from loosening or corroding the lowest row of shingles. Strong winds can potentially push precipitation up under shingles, but a properly installed drip edge creates an effective barrier.
Second, drip edges maintain the structural integrity of your roof by keeping moisture from seeping into vulnerable wooden components. Without this protection, water can infiltrate your attic or walls, causing extensive damage over time.
Furthermore, drip edges work in tandem with your gutter system and roof rain diverter to ensure proper water management. The metal flashing creates a clean transition point that guides water directly into gutters rather than allowing it to run down exterior walls or splash against the foundation.
The relationship between drip edges and overhang roof designs
The efficiency of flat roof drip edge types and those used on sloped roofs depends largely on how they interact with the roof’s overhang design. The primary drip edge is essentially the lower surface of the bottom row of asphalt tiles or other roof covering. However, the natural lower edges of materials like asphalt shingles may encourage moisture to work its way beneath them.
Installing specialized metal roof drip edge types effectively extends the roof sheathing slightly, creating a more defined drip point. This slight extension makes a substantial difference in performance, as it ensures water travels away from the structure rather than tracking back toward the fascia.
For optimal performance, drip edge installation requires precision. The metal should extend up the roof deck by a minimum of 2 inches and extend beyond the roof sheathing by at least 0.25 inches. This positioning helps direct rainwater into the gutters, keeping it away from the fascia boards. Adjacent drip edge pieces should overlap by at least 2 inches to ensure continuous protection.
Types of roof drip edge are designed with these requirements in mind, featuring shapes and extensions that complement different overhang configurations. The relationship between proper drip edge installation and roof overhang is symbiotic – each element enhances the other’s performance when correctly implemented.
Proper selection and installation of roof drip edge types remain among the most cost-effective ways to protect your roofing investment, with benefits far outweighing their relatively modest cost.
Common Materials Used in Drip Edge Manufacturing
Selecting the right material for your roof drip edge types can dramatically affect both performance and longevity. The material choice often depends on climate conditions, budget constraints, and esthetic preferences. Let’s examine the most popular materials used by manufacturers today.
Aluminum drip edges: lightweight and versatile
Aluminum stands as the most widely used material for roof drip edge types across the United States. This popularity stems from its excellent balance of properties and cost-effectiveness. Typically priced between $0.30 and $1.00 per linear foot, aluminum drip edges offer exceptional value for homeowners working within budget constraints.
The primary advantage of aluminum lies in its natural corrosion resistance, making it particularly suitable for coastal areas where salt exposure poses challenges to other metals. Moreover, aluminum’s lightweight nature significantly simplifies the installation process, allowing for quicker completion of roofing projects.
Versatility remains another compelling feature of aluminum roof drip edge types. These products are available in various colors with enamel finishes, enabling homeowners to match their drip edges perfectly with existing roof esthetics. Although not as structurally robust as other options, aluminum drip edges generally provide reliable service for 20 to 30 years with proper installation.
Galvanized steel: durability in harsh conditions
For regions experiencing extreme weather conditions, galvanized steel offers superior protection among drip edge roof flashing types. Priced slightly higher than aluminum at approximately $0.50 to $1.20 per linear foot, galvanized steel delivers exceptional structural integrity and wind resistance.
The galvanization process involves applying a protective zinc coating that prevents rust formation, a crucial factor for any metal exposed to moisture. This treatment makes steel particularly effective in areas with high humidity or frequent precipitation. Furthermore, galvanized steel drip edges demonstrate remarkable longevity, often lasting between 30 to 50+ years thanks to their enhanced corrosion resistance.
Throughout much of construction history, galvanized steel was the standard material for drip edges before aluminum gained market share. Despite this shift, many contractors still recommend galvanized steel for properties in wind-prone areas or harsh climates where structural integrity cannot be compromised. When selecting metal roof drip edge types for maximum durability, galvanized steel remains a top contender.
Copper and other premium options
Copper represents the premium tier of drip edge materials, commanding prices between $3.50 and $7.50 per linear foot. Despite the higher initial investment, copper offers unique advantages that make it worth considering for certain applications.
The distinctive esthetic appeal of copper makes it particularly desirable for high-end homes or historic renovations. As copper ages, it develops a beautiful patina ranging from deep browns to vibrant greens, adding character and visual interest to your roofing system. This natural aging process creates a living finish that many homeowners find extremely attractive.
Beyond esthetics, copper boasts exceptional longevity, often exceeding 50 years of service life. Its natural resistance to corrosion, cracking, and impact damage makes it virtually maintenance-free compared to other types of roof drip edge. Additionally, copper possesses natural properties that inhibit mold and algae growth, further protecting your roof structure.
Although less common, non-metallic options like plastic, vinyl, and fiberglass exist for specific applications. However, these materials generally lack the durability required for roof applications and are better suited for windows and doors where exposure is less severe. For flat roof drip edge types that require maximum protection, metal options remain the industry standard due to their superior performance in managing water flow along the overhang roof line.
Exploring Different Roof Drip Edge Profiles
Beyond material selection, understanding roof drip edge types requires exploring the different profile shapes available. Each profile style serves specific purposes based on roof design, climate considerations, and installation requirements. Contractors and homeowners alike must understand these profile differences to make informed decisions about which type best suits their particular roofing needs.
Type C (L-style): applications and benefits
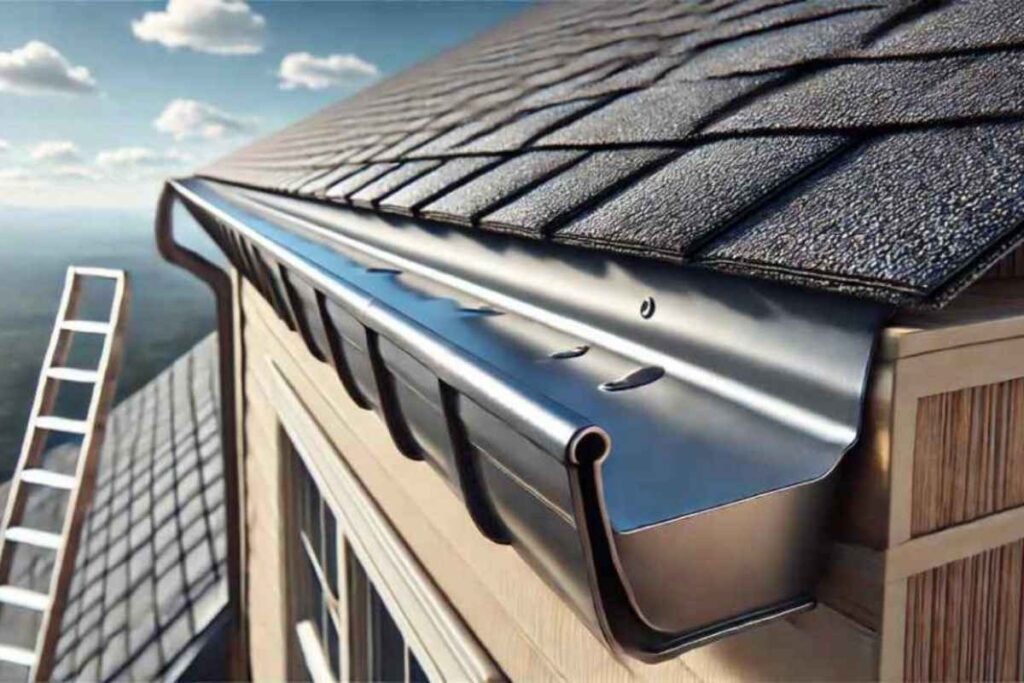
The Type C drip edge represents the most basic and commonly used profile among roof drip edge types. Shaped like the letter “L” with a 90-degree bend and a small flare at the bottom edge, this profile directs water away from the fascia while maintaining a simple design. Most suitable for low-profile and low-slope roofs, Type C drip edges offer excellent protection at an affordable price point of $0.30 to $1.00 per linear foot.
Their straightforward design makes Type C drip edges particularly easy to install, which contributes to their widespread popularity. For homeowners with metal roofs or those in areas with moderate rainfall, this profile often provides sufficient protection without unnecessary complexity. The flared bottom edge effectively prevents water from tracking back onto the fascia, thereby protecting the wooden components of the overhang roof structure.
Type D (T-style): enhanced water diversion
For homeowners seeking superior water diversion capabilities, Type D profiles offer a significant advantage. Shaped like the letter “T” with a lower flange at the bottom, these roof drip edge types extend further out over the gutter than L-style edges. This additional extension makes Type D profiles remarkably effective at directing water away from the roof structure, especially during heavy downpours.
Though slightly more expensive at $1.00 to $1.50 per linear foot, the Asphalt Roofing Manufacturers Association (ARMA) specifically recommends Type D drip edges for most residential roofs. Their design prevents wind-driven rain from being blown back onto the fascia, offering enhanced protection that justifies the higher price point for many homeowners.
Type F and extended profiles for special applications
Type F drip edges feature longer leading edges specifically designed for installation over existing shingles or on rake edges. Priced similarly to Type C at $0.30 to $1.00 per linear foot, they provide an excellent solution when retrofitting drip edges to finished roofs without removing the shingles. This profile works exceptionally well with roof rain diverter systems by ensuring proper water flow into gutters.
Sometimes called “gutter aprons,” Type F profiles are particularly beneficial in areas experiencing high winds or substantial rainfall. The extended design provides additional protection against water infiltration while maintaining compatibility with existing gutter systems.
Specialized metal roof drip edge types
For metal roofing systems, specialized profiles exist to address unique installation requirements. These metal roof drip edge types include variations like Z-Type profiles that offer additional protection against water infiltration in areas prone to heavy rainfall. When selecting drip edges for metal roofs, contractors typically recommend profiles that provide a clean transition between the roof edge and gutter system.
Flat roof drip edge types likewise require specific considerations, with modified profiles that accommodate the minimal slope while still effectively directing water away from the structure. Regardless of profile selection, proper installation remains critical to ensuring optimal performance of any drip edge roof flashing types installed.
Selecting the Right Drip Edge for Your Roof Type
Choosing appropriate roof drip edge types can be challenging with so many options available. The right selection ultimately depends on your specific roof configuration, local climate, and building codes.
Considerations for sloped roofs
For sloped roofs, the angle of your roof plays a crucial role in determining suitable roof drip edge types. Steeper roofs typically benefit from Type C (L-style) or Type D (T-style) profiles, with the latter recommended by the Asphalt Roofing Manufacturers Association for most residential applications. For asphalt shingle roofs, proper positioning of the drip edge is critical—it should be placed directly on the deck, either over or under the underlayment, but always beneath the starter shingles.
In areas experiencing high winds exceeding 110 mph, mechanical fastening should be reduced from the standard 12 inches to 4 inches on center to provide superior wind resistance. First and foremost, verify your local building codes, as many now mandate drip edges at both eaves and gables of shingle roofs.
Flat roof drip edge types and requirements
Flat roof drip edge types demand special attention since water drainage moves more slowly compared to pitched roofs. Consequently, these roofs require drip edges specifically designed to prevent water pooling, which can lead to structural damage over time. Type C drip edges with their 90-degree angle and lower flange work effectively for flat roofs.
The drip edge on flat roofs extends beyond the roof’s edge to direct water away from the building’s walls, preventing potential wall damage and foundation erosion. Obviously, professional installation becomes even more critical with flat roofs, as improper installation could create entry points for moisture.
Matching drip edges with your gutter system and roof rain diverter
Proper integration between your roof drip edge types and gutter system is essential for effective water management. Indeed, the drip edge should angle correctly to ensure water flows into gutters rather than behind them. Without proper alignment, water can seep behind gutters and damage the fascia board—the very component supporting your entire gutter system.
When incorporating a roof rain diverter, coordinate its installation with your drip edge to create a cohesive water management system. A rain diverter works alongside the drip edge to redirect water from entryways and walkways, extending the life of exterior paint and reducing slip hazards.
The color of your drip edge should ideally match your fascia for esthetic appeal, with white being the most common choice for residential applications. Selecting compatible roof drip edge types creates a functional and visually pleasing roofing system that protects your home for years to come.
Installation Best Practices for Different Drip Edge Types
Proper installation is the cornerstone of effective roof drip edge performance. Even the highest quality roof drip edge types can fail if improperly installed, potentially leading to water damage and structural issues. Understanding installation best practices for each type ensures maximum protection and longevity.
New roof installation sequence
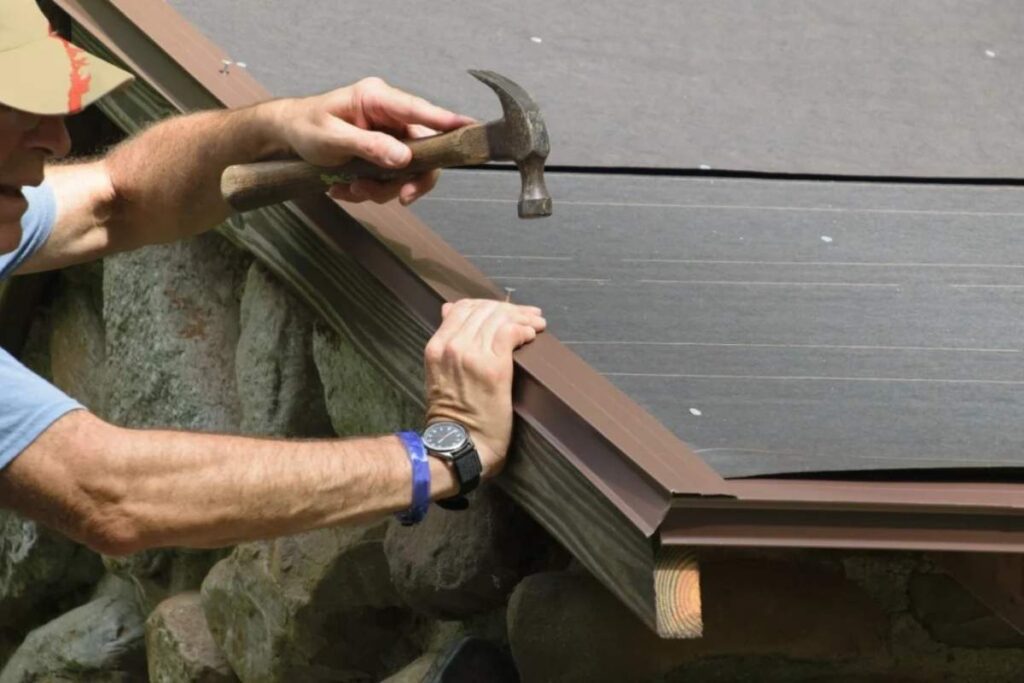
When installing roof drip edge types on a new roof, following the correct sequence is crucial. Initially, begin at the eaves by placing the drip edge along the roof’s bottom edge, ensuring it extends slightly beyond the fascia to direct water away from the structure. Secure the drip edge with roofing nails every 12 inches along the roof deck.
For optimal water management, install drip edges on eaves before applying underlayment, then place the underlayment over this eave drip edge. Subsequently, install rake drip edges after underlayment, placing them on top of the underlayment material. This configuration creates a proper water flow path that protects the overhang roof from moisture infiltration.
When joining sections, overlap pieces by 2-3 inches, always directing overlaps away from visible areas for esthetic purposes. Most manufacturers recommend starting with full pieces at prominent locations, placing joints at corners for a cleaner appearance.
Retrofitting drip edges to existing roofs
Adding roof drip edge types to an existing roof requires careful handling to prevent damage to shingles. First, gently lift the existing shingles using wooden wedges spaced approximately two feet apart. These wedges create sufficient space to slide the new drip edge into position without breaking or cracking the shingles.
Once positioned correctly, secure the drip edge with roofing nails and apply quality sealant along the top edge to prevent leaks. The retrofit process works particularly well with Type F drip edge roof flashing types, as they’re specifically designed for installation over existing shingles.
Common installation mistakes to avoid
Numerous installation errors can compromise the effectiveness of various roof drip edge types. Perhaps the most frequent mistake is positioning the drip edge flush with the fascia board, which allows water to track back onto the fascia. Instead, the drip edge should extend beyond the fascia by approximately 1½ inches.
Another critical error involves incorrect shingle overhang. Shingles should extend beyond the drip edge by about ⅜ to ½ inch, creating a proper drip point. Many installers also place nails incorrectly or use insufficient fasteners. Proper spacing requires nails every 8-10 inches for adequate security, particularly in high-wind areas.
Flat roof drip edge types demand special attention to ensure proper water flow toward gutters and roof rain diverter systems. Improper corner fabrication represents yet another common issue, as poorly cut corners create entry points for water infiltration. Metal roof drip edge types specifically require precise cutting and folding at corners to maintain a continuous moisture barrier.
Roof Drip Edge Types Frequently Asked Questions
What are the main types of roof drip edges?
The three main types of roof drip edge profiles are Type C, Type D, and Type F. Type C is L-shaped and the most affordable, Type D is T-shaped and keeps water further from the fascia, and Type F has a longer leading edge useful for installation over existing shingles or on rake edges.
How does a drip edge protect my roof?
A drip edge protects your roof by directing water away from the fascia and into the gutters, preventing moisture from seeping under shingles and into the roof structure. It also helps prevent wind-driven rain from damaging the lowest row of shingles and creates a barrier against pests.
What materials are commonly used for drip edges?
Common materials for drip edges include aluminum, which is lightweight and versatile; galvanized steel, known for its durability in harsh conditions; and copper, a premium option with excellent longevity. The choice often depends on climate, budget, and esthetic preferences.
Should the drip edge match the roof or fascia color?
Typically, the drip edge should match the color of your fascia and other trim elements rather than the roof color. This creates a cohesive look for the exterior trim of your home. White is a common choice for residential applications, but you can paint the drip edge to match your specific trim color.
What are some common installation mistakes to avoid with drip edges?
Common installation mistakes include positioning the drip edge flush with the fascia board instead of extending it slightly, incorrect shingle overhang, improper nail spacing, and poor corner fabrication. It’s crucial to follow manufacturer guidelines and local building codes for proper installation to ensure effective water management and roof protection.
Which roof drip edge type is best for my roof?
The best type depends on your roof’s design, climate, and local building codes. Type D is often preferred for its wider flange, which provides better protection. Consult a roofing professional for specific recommendations.
How is a roof drip edge installed?
A roof drip edge is installed along the roof’s edge before the roofing material. It is nailed to the roof deck, with the flange extending over the fascia board. Proper installation ensures water is directed into the gutters. Incorrect installation can lead to water damage.
What materials are roof drip edges made from?
Roof drip edges are typically made from aluminum, galvanized steel, or copper. Aluminum is popular for its affordability and corrosion resistance. Galvanized steel is stronger but can rust over time. Copper offers a premium look and durability.