When choosing home improvements, knowing how to install synthetic roof underlayment adds critical protection against moisture. This choice often outperforms older alternatives like traditional felt, thanks to better durability and resistance to tearing. It also helps maintain your roof’s overall integrity by repelling water and keeping out debris. Many homeowners appreciate that synthetic options can make future adjustments or improvements simpler as well. This can be particularly beneficial if you want to maximize your home’s energy efficiency and structural stability over time, especially in regions prone to harsh weather.
A sturdy synthetic barrier can mean fewer worries about leaks in the long run. You’ll also gain peace of mind knowing that you’ve added another line of defense beneath shingles. People who tackle this kind of project themselves often find it more manageable than they anticipated as long as they have the right knowledge and materials. Below, we’ll walk through key aspects, safety precautions, and practical tips to ensure your project goes smoothly.
Why Synthetic Rooftop Protection Matters
Synthetic layers effectively add an extra shell that stands up to UV rays, strong winds, and persistent moisture. Unlike felt, which can become stiff or crack under intense heat, robust synthetic materials maintain flexibility over a wide range of temperatures. Roofs often face challenging environments, from scorching summers to torrential rainstorms, so investing in a better base can make a real difference.
Shingles certainly hold their ground against many elements, but a good underlayment can prevent small openings from exposing your home’s interior to water. If wind-driven rain seeps beneath your roofing surface, synthetic products have a faster drying period compared to some older materials. This helps prevent mold growth, which can wreak havoc on your home and health. By choosing a synthetic underlayment, you’re giving your roof an extended life, potentially minimizing future replacement or repair costs.
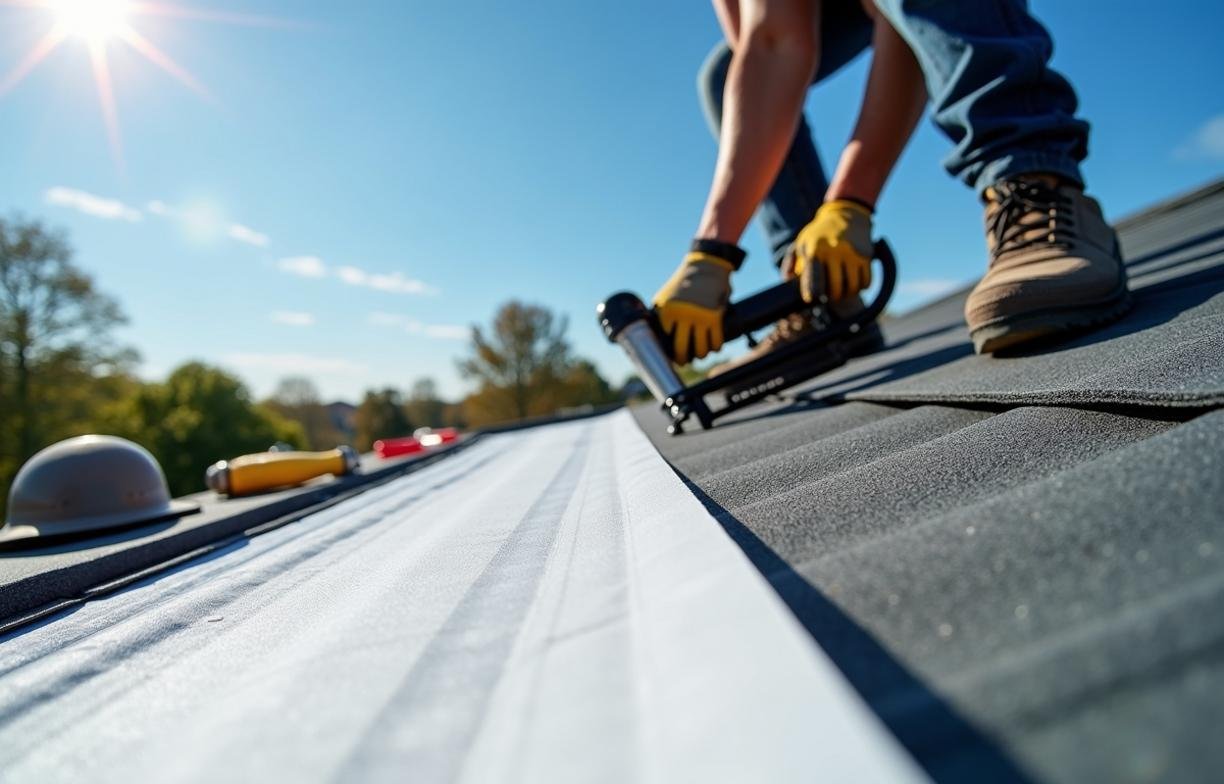
Essential Tools For Underlayment Installation
Working on a roofing project demands the right equipment along with careful attention to safety measures. A comfortable and secure ladder is non-negotiable. You’ll also want a solid hammer or roofing nail gun, roofing nails with plastic caps, a utility knife, and chalk lines for marking where each course should align. Store your materials in a dry area until you need them on the roof. Anything that gets wet early on can lose its grip and introduce unexpected hazards.
Keep a pair of sturdy work gloves handy for better grip and protection against sharp edges. Don’t skip non-slip shoes designed for roof wear, especially if you’ll be maneuvering across sloped surfaces. A simple harness system can further reduce your risk of falls. It’s worth noting that synthetic sheeting can become slippery if you encounter sudden rain or morning dew, so always maintain steady footing.
Checking The Roof Deck
Before securing anything, verify that your roof deck is smooth, even, and free of protruding nails or damaged wood. Any uneven spot can cause wrinkles or voids where moisture might collect. A quick scan for weak or rotted areas helps you avoid bigger problems with synthetic roof underlayment later. If you see delamination or missing fasteners on the deck, repair them before adding your new covering. When the underlying wood is stable, the synthetic sheet can adhere properly and stand up to wind uplift.
Choosing Proper Fasteners
Some folks underestimate the role of nails in ensuring a firm hold. Standard roofing nails with wide plastic caps exert better pressure over the underlayment, reducing the chance of tears. Look for galvanized or corrosion-resistant nails because they stand up to moisture much longer. If you have a powered nail gun, dial in the proper depth so you don’t overdrive the nail and create a potential weak spot.
Detailed Steps To Secure Your New Layer
Setting your new synthetic barrier can be more straightforward than you might assume. This section outlines the most common approach that many homeowners find manageable.
Begin by rolling out the first course at the bottom edge of the roof. Let it drape slightly over the drip edge, usually around one inch or so. Trim with a sharp utility knife where necessary. This creates a neat overlap that keeps water flowing off properly, rather than seeping beneath.
Align the material using your chalk lines for guidance. Use roofing nails with caps every six to eight inches along the edges, ensuring they penetrate the deck firmly. Fasten the center areas of the sheet with nails spaced about a foot apart. Keeping a consistent anchoring pattern helps your underlayment resist shifting in high winds.
Overlapping Each Row
One significant advantage of synthetic sheets is that they often come with printed overlap guides. These lines show you how far to overlap the top course over the lower course. Usually, you’ll overlap by about four inches. This slight layering prevents water from creeping under the seams. Just be sure you don’t stand on the unsecured part of a sheet to avoid sudden movement or bunching.
Maintaining A Straight Run
As you work your way up to the ridge, check that each row stays aligned. A strong line of sight or chalk reference can keep each shift consistent, avoiding crooked runs or large wrinkles. When you reach vents, chimneys, or other roof penetrations, carefully cut around them and add extra nails around the edges of the cut. Those nooks tend to invite unwanted water if not sealed properly.
Mistakes To Avoid During Roof Projects
Skipping the drip edge is an error many newcomers make. That metal strip guides water away from the fascia boards and your walls. Without it, water can flow into places you definitely don’t want it to go. Synthetic layers work best in harmony with other parts, including drip edges, flashing, and proper ridge venting.
Another pitfall is failing to secure overlaps well. If you place too few nails along a seam, your underlayment may start flapping in high winds. Moisture can also sneak in, and once it does, it often travels further than you’d guess. Stay consistent with your nailing pattern, and don’t skimp on extra fasteners around roof protrusions.
Overexposure To Sunlight
Although synthetic materials often boast UV-resistant qualities, prolonged exposure without shingles can still cause them to degrade. If you must leave your roof uncovered for longer than recommended by the manufacturer, you risk diminishing the effectiveness of your underlayment. Try to schedule your project in a way that allows you to install shingles or your final roofing layer soon after putting down the synthetic barrier.
Tips For Working Safely At Heights
Moving confidently on a roof demands some practice. If you’re feeling uneasy, consider asking someone to spot you or hand over materials. Always test your ladder for stability before climbing up. A roof harness isn’t just for professionals, and a simple kit can keep you secure. Distractions can lead to slips, so focus on each step and take breaks when you need them.
Dealing With Changing Weather
It’s best to work on a dry, clear day with minimal wind. If rain threatens, wait until you have a good window of time. Wet surfaces boost the chance of slips. Sudden rainfalls can make surfaces slick, and your synthetic layer can be more difficult to fasten properly if you’re rushing.
Enhancing Roof Ventilation
Once your synthetic material is down, consider whether your attic space could benefit from more ventilation. Installing ridge vents or soffit vents can help manage heat and moisture build-up beneath the roof deck. Effective airflow can also boost the longevity of both your roof deck and your underlayment. Synthetic coverings are already designed to resist moisture, but proper ventilation takes your roof protection to the next level.
Checking Flashing Around All Openings
While dealing with eaves or ridges, also pay attention to areas around skylights and chimneys. Water often tries to find any possible route in, and poorly installed flashing is a prime target. Seal any gaps or cracks you find with roofing cement or specialized tape recommended by your synthetic underlayment manufacturer. Addressing even small openings early can spare you from bigger troubles later on.
Maintaining Your Roof Over Time
Regular inspections matter. Schedule at least an annual check, especially after storms. If you spot damaged shingles, patch them promptly. Even though the synthetic base layer offers substantial protection, you’ll extend its lifespan significantly if the outer roofing material stays in top shape. Catching peeling, curling, or missing shingles before water intrusion occurs is always easier and cheaper.
Cleaning off leaves, twigs, and other debris helps ensure that your underlayment isn’t overwhelmed by long-term moisture accumulation. Clogged gutters can send water back up and under shingles, undermining the hard work you did. Keeping the entire roofing system balanced, including the gutters, ensures you get the most out of your synthetic barrier.
Looking For Early Warning Signs
Bulges or unusually soft areas underfoot might indicate a problem in the deck beneath. Stay alert for these signs because the underlayment can’t fix a decaying structural board on its own. Address any underlying issues swiftly to keep the whole system robust. If you’re ever unsure about a section of your roof, consult a trusted roofing specialist. However, simple visual checks often reveal the status of your underlayment well enough for the average homeowner.
Thoughts On A Secure Roof
A quality synthetic layer is more than just a trend it’s a vital step toward ensuring your roof can handle fluctuating temperatures, rough weather, and daily wear. Investing in quality materials, taking the time to prep your surface, and nailing everything in clean rows can save you a lot of hassle in the years ahead. Whether you choose to manage this on your own or enlist help from a professional, the outcome is the same: a stronger, more resilient roofing system that protects your home season after season.
Roof replacements don’t come around often, so taking the steps to fasten a dependable synthetic underlayment now sets the stage for fewer surprises. Follow safe practices, plan properly, and you’ll be ready for whatever the elements send your way.
Frequently Asked Questions
How Do You Attach Synthetic Underlayment?
During roof underlayment installation, synthetic underlayment is typically rolled out horizontally starting at the eaves and fastened directly to the roof deck. It is attached using approved fasteners such as plastic cap nails or cap staples to prevent tearing and ensure a secure hold. Each course should be laid flat and smooth to avoid wrinkles that could transfer through the final roofing material.
Can Synthetic Roof Underlayment Be Stapled?
Yes, synthetic underlayment can be stapled, but only if cap staples are used instead of standard narrow staples. When following proper guidelines for how to install synthetic underlayment on roof, cap staples help distribute pressure and reduce the risk of tearing in high winds. Always check the manufacturer’s specifications to confirm that stapling is an approved fastening method.
How Much Overlap on Synthetic Roof Underlayment?
Most manufacturers recommend overlapping synthetic underlayment for roof by at least 4 inches on horizontal seams and 6 inches on vertical seams. This overlap ensures proper water shedding and prevents moisture intrusion at the joints. In low-slope roofs or areas with heavy weather exposure, greater overlap may be required.
Do You Apply Drip Edge or Underlayment First?
At the eaves, drip edge is typically installed first, followed by the underlayment over the top of it to direct water into the gutter. Along the rakes, the underlayment is installed first and the drip edge is placed over it. This layered approach helps control water flow and protects the roof deck from wind-driven rain.
What Is the Best Fastener for Roof Underlayment?
The best fasteners for roof underlayment are plastic cap nails or cap staples because they provide a wide holding surface. These fasteners reduce the chance of tears and improve wind resistance compared to standard nails or staples. Using the correct fastener type also helps meet manufacturer warranties and local building codes.
How Long Can Synthetic Roof Underlayment Be Exposed?
Exposure time varies by product, but many synthetic underlayments can be exposed for 30 to 180 days before the final roofing is installed. Prolonged UV exposure beyond the rated limit can weaken the material and reduce its waterproofing ability. Always verify the exact exposure rating listed by the manufacturer.
Can You Put Two Layers of Underlayment on a Roof?
Yes, two layers of underlayment can be installed on a roof, and this is sometimes required by code in cold climates or on low-slope roofs. Double layering provides additional protection against water intrusion and ice damming. However, the layers must be installed correctly to avoid trapping moisture between them.