Roof vents are an integral part of a home’s health, providing essential ventilation to your attic, which prevents the buildup of moisture and heat. Check out this detailed, step-by-step approach on how to install a roof vent, ensuring your home remains protected and efficient.
Importance of Roof Vents
Before we delve into the installation process, it’s crucial to understand why roof vents are so important. Roof vents provide ventilation to your attic, preventing moisture buildup, maintaining temperature balance, and enhancing the overall energy efficiency of your home. They are also critical in preventing the formation of ice dams during winter. Ensuring proper ventilation through roof vents is key to preventing mold, mildew, and ensuring energy efficiency by maintaining a balance between intake and exhaust in the attic space.
Different Types of Roof Vents
There are various types of roof vents, each with its unique features and installation procedures. Some of the most common types include:
Gable Vents
Positioned on the side of a home near the roof ridge, gable vents are designed to be inserted into the exterior wall. They serve a dual purpose, functioning as both intake and exhaust vents. For optimal performance, it is recommended that gable vents be used in conjunction with soffit vents to ensure adequate air intake.
The installation of gable vents involves framing, cutting a precise hole in the wall, applying waterproofing measures, installing flashing, and securing the vent with screws or sealant to protect against weather elements.
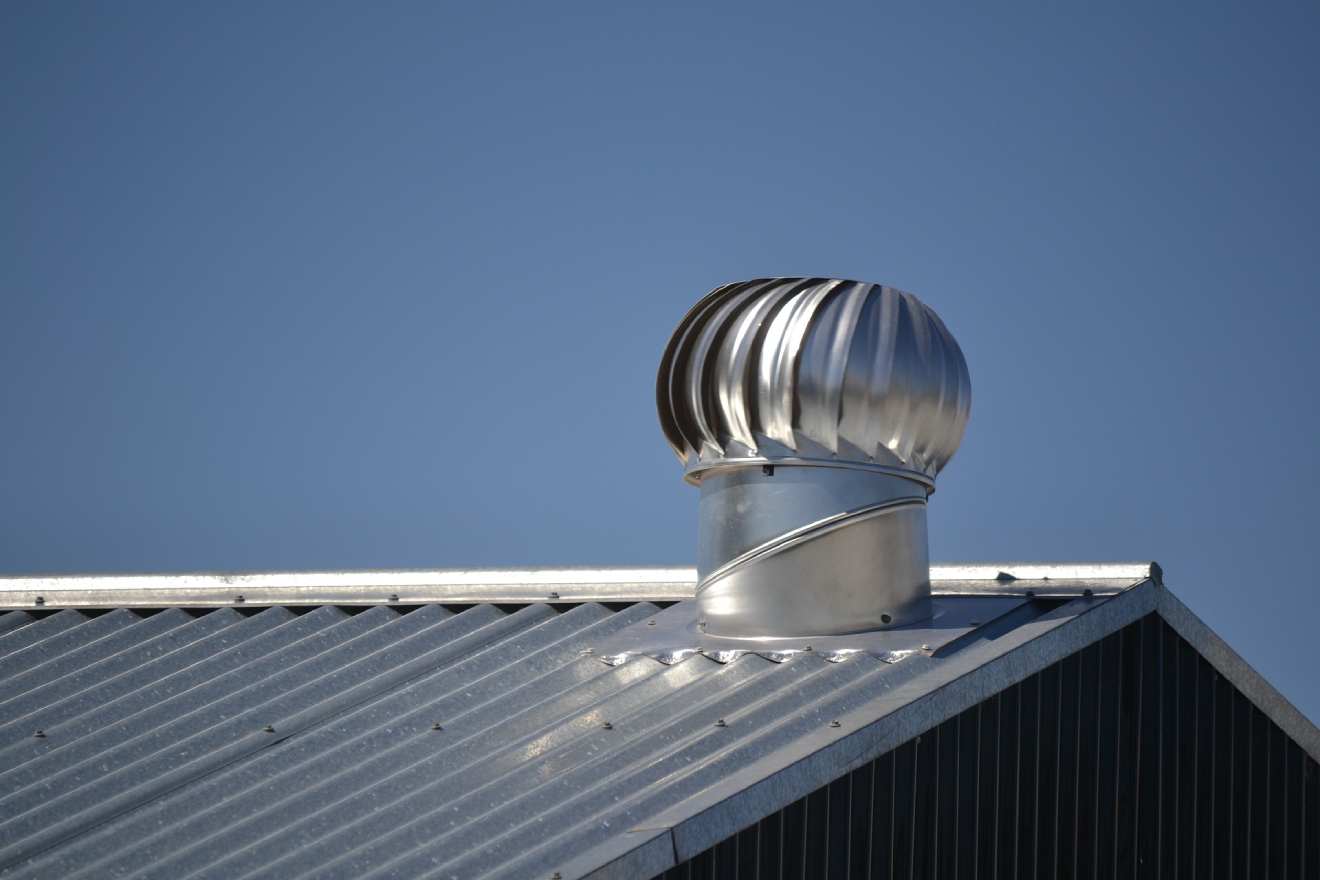
Wind Turbines
Also known as turbine vents, these are large, round vents featuring a rotating turbine. The movement of the turbine helps to efficiently pull hot air out of the attic, making them especially beneficial in older homes where effective attic ventilation is crucial.
The installation process of turbine vents is often compared to that of static and powered vents, requiring careful placement to maximize air extraction and minimize moisture buildup.
Box Vents
Box vents are square-shaped vents that have a screened opening for air to flow in and out. They are simple to install and are often used in tandem with other vent types.
Ridge Vents
Installed at the highest peak of your roof, ridge vents are excellent for allowing hot air to escape from your attic. They can be easily concealed, maintaining the aesthetic appeal of your roof.
Off Ridge Vents
Off ridge vents are installed just below the roof’s peak. They are larger than box vents and can release more air.
Power Vents
Power vents use electricity to circulate air and remove heat and moisture. They can come in various forms, including ridge vents and soffit vents.
Soffit Vents
Installed under the roof’s eaves or overhangs, soffit vents allow air to escape near your attic floors while keeping pests out.
Necessary Materials and Tools
To install a roof vent, you’ll need some key materials and tools including:
- Roof vent
- Shingles
- Roofing nails
- Drill and drill bits
- Pry bar
- Hammer
- Jigsaw
- Sealant or roofing tar
- Caulk gun
Step-by-Step Guide to Installing a Roof Vent
Here’s a step-by-step guide on how to install roof vents, focusing on roof vent installation on an asphalt shingled roof:
Step 1: Determine the best location for your roof vent by considering the layout and size of your attic space. It’s crucial to ensure that the vent will be positioned in a spot that allows for optimal airflow and ventilation.
Step 2: Measure the area where the vent will be installed to ensure it fits properly.
Step 3: Cut the vent hole in the roof carefully to accommodate the size of the vent. This precise cut is essential for the vent to fit securely.
Step 4: Place the new roof vent over the hole, making sure it’s aligned correctly.
Step 5: Secure the vent to the roof and ensure a watertight seal. Proper roof vent installation, including the use of an exhaust vent, is critical to expel hot air from the attic and prevent moisture buildup.
Step 1: Determine Vent Position
The first step in installing a roof vent is determining its position. You should access your attic and drive a nail through the roof at the spot where you plan to install the vent. This hole will serve as a guide when you’re on the roof.
Step 2: Prepare the Shingles
After marking the vent spot, you’ll need to prepare the shingles. Carefully remove the shingles that would be affected by the vent installation. Extra careful making sure not to damage the surrounding shingles which could causes leaks inside
Step 3: Cut a Hole in the Roof
Next, carefully cut out the vent hole around the nail marking the vent spot. This vent hole should be either circular or rectangular, depending on the type of vent you’re installing, ensuring precision to accommodate the roof vent securely.
Step 4: Install the Vent
Once the hole is ready, position your roof vent and mark where you’ll cut the old shingles. You’ll need to reinstall the lower shingles under the vent so that water can slide right off them.
Step 5: Secure the Vent
Install the roof vent using roofing tar and nails. Generally, a roof vent only needs around 4–6 nails to secure them on your roof. After nailing down the vent, apply caulk around the nails to ensure your roof stays waterproof.
There are many types of roofs, be sure to learn their specific needs before installing a vent.
Professional Roofing Services
While installing a roof vent is a manageable DIY project, you might prefer to hire a professional roofer if you’re uncomfortable working on your roof. A professional roofer can ensure a high-quality, leak-free installation, and will also be able to take care of procuring the dumpsters for your roofing project as well as any other equipment or services that are required.
A well-installed roof vent ensures efficient home ventilation, guarding against moisture and related issues. Installing a roof vent can be a rewarding DIY project, enhancing your home’s ventilation. Always remember that safety is crucial, particularly when working at heights.