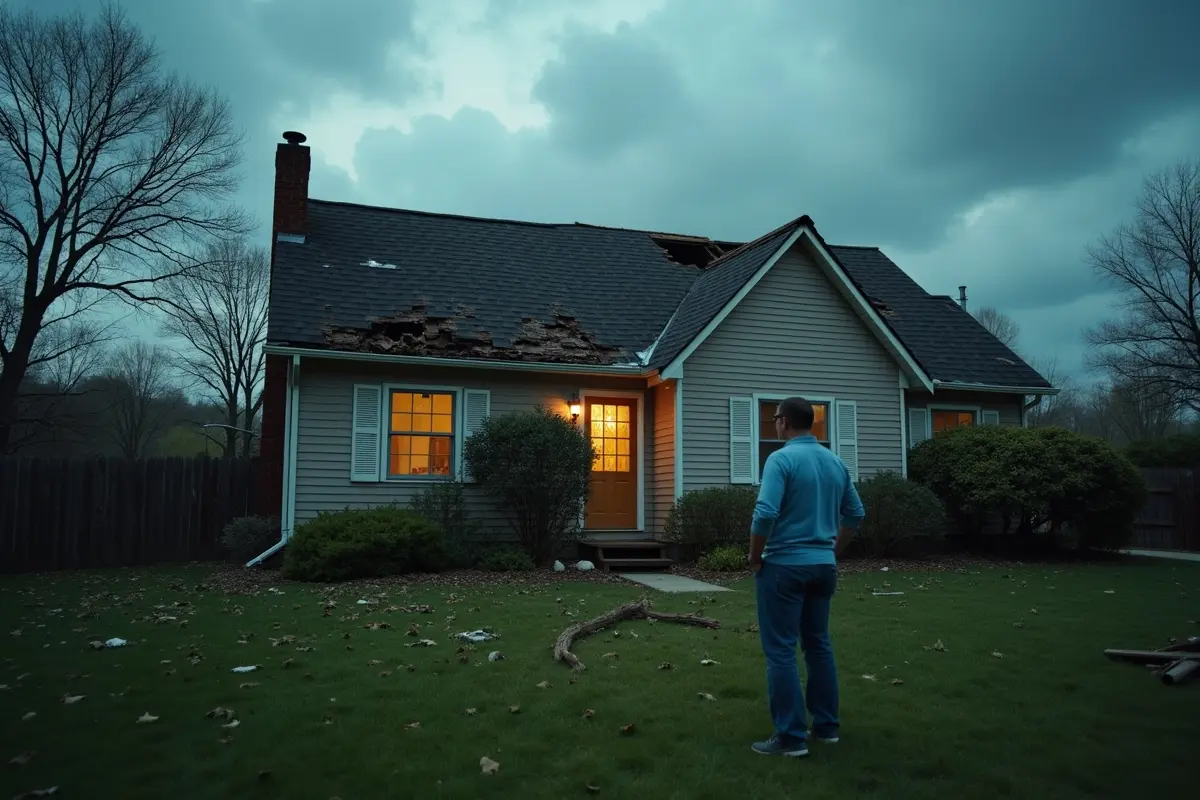
The period immediately after a storm is important for protecting people and limiting additional damage. Prompt attention to safety, temporary protection, photos, and claim paperwork can help protect the house and preserve a clear record of what happened.
Put safety first before you touch anything
Stay off the roof. Wet shingles are slick, and soft decking can give way without warning.
Keep family members and pets out of any room with a sagging ceiling or pooling water on the floor. Don’t use rooms where you see daylight through the roof boards or smell a strong damp odor. If a ceiling bows or you hear cracking overhead, leave the house and call emergency services. Don’t touch switches or outlets in wet rooms.
Stay clear of downed lines and leaning poles. Don’t try to pull branches off wires or lift a ladder near them. Call the utility and keep others back until crews say it’s safe. Cleanup during the first morning rush can lead to dangerous close calls.
Once everyone is safe, turn off power to wet areas at the breaker if you can do it while standing somewhere dry. Move electronics, papers, furniture, and rugs to a dry room. Then stop and leave the remaining mess in place for photos.
Check the attic only from a secure access point, using a flashlight. Don’t touch wet wiring or soggy drywall from below, and do not enter unfinished areas or step between joists. Leave climbing and crawling to a professional with the right safety gear.
Stop water intrusion fast with temporary cover
Water often does more harm than wind in the hours after a storm. A lifted shingle or cracked flashing lets rain run under the roof and into insulation, drywall, wood framing, and wiring. That wet material gets heavy quickly, and it can start to smell within a day or two.
Don’t climb onto a wet or steep roof or try to install plastic or a tarp yourself. Temporary protection must be secured correctly without causing more damage to sound shingles, flashing, or decking. Call a qualified contractor for emergency covering when the damaged area is high, unstable, or difficult to reach.
A good crew will secure temporary cover over ridges and eaves with battens so the wind is less likely to peel it back. Ask for dated photos of the work and a written invoice listing materials and labor. Your policy may reimburse reasonable mitigation costs, depending on its terms and local requirements, so keep the invoice with your claim file.
Inside, set bins under drips and lay towels along wet walls. Turn off soggy lights at the switch and the breaker when it is safe to do so. Open windows for airflow once the rain stops and run fans where electrical conditions allow. These steps can limit further moisture damage while you wait for professional help.
Delay gets expensive. According to FEMA, just one inch of water can cause as much as $25,000 in damage to a home (FEMA). That figure makes sense when you consider soaked insulation, swollen decking, stained ceilings, and flooring that must be torn out. Prompt mitigation may prevent a manageable roof opening from causing much broader interior damage.
Document damage before you clean anything
Many homeowners weaken their own claim by cleaning up too soon. They bag shingles, stack limbs, wipe ceilings, and straighten gutters before anyone has seen the damage. Once that proof is gone, it may be difficult to recreate.
Take dated photos and video before temporary covering goes on and before debris is moved. Walk the yard and photograph missing shingles, dented gutters, cracked flashing, and bent vents from several angles. Then go inside and capture every water stain, blistered paint spot, damp carpet edge, and wet attic board you find. Open closets and look behind curtains where water may have traveled.
Water travels.
Write down the storm date, time, wind speed, and hail size if you know them. Save news alerts or weather app screenshots with the file. Note when you first saw drips inside. That timeline can help the adjuster distinguish storm damage from old wear or an earlier maintenance issue.
Store copies in two places. Keep one set on your phone and put a second set in cloud storage. If a contractor or adjuster misplaces a file, you will still have your own record.
Bag a few fallen shingle pieces and loose granules in a zip bag instead of throwing them away. Your contractor may be able to use them to identify the color and type, while the adjuster can inspect possible hail marks up close. Label the bag with the date and the part of the yard where you found each piece.
Get a pro inspection and line up local help
Damage visible from the driveway is only part of the story. Wind can lift shingle edges and bend flashing in places you cannot see from the ground. It can also pop nails through shingle faces. Hail bruises shingles and knocks off granules, shortening roof life even when there is no active drip. Underlayment may tear while shingles appear intact, and decking can soak and swell beneath a small opening.
You need trained eyes on the roof. A licensed and insured contractor can walk the slopes, check valleys and vents, lift shingle tabs to look for creased mats, and photograph soft or stained decking from the attic. The resulting report gives the insurer and homeowner a clearer scope of work.
Start with a local company that has an established address and can provide written documentation. You can contact Tarrytown Roofing to request an inspection and a report to share with your insurer. Look for measurements, photos, material notes, and a line-item explanation of which damage appears storm-related and which is associated with age or wear.
Be wary of door knockers who arrive in large numbers after a storm. Some storm chasers demand cash up front, push homeowners to sign immediately, use thin shingles or reuse flashing, and leave town before leaks appear. Ask for proof of license and insurance, a local address, recent jobs you can drive by, and references you can call. Check manufacturer credentials such as GAF Master Elite or Owens Corning Preferred Contractor, and review complaint history with the Better Business Bureau. Don’t sign with anyone who will not put the scope, materials, price, and warranty in writing.
File the claim early and learn the money terms
Review your policy and notify your insurer as soon as reasonably possible after discovering damage. Notice deadlines and requirements vary by policy and jurisdiction, and waiting may complicate the claim. Have your policy number, storm date, damage list, and contact number ready. Describe what you can see without guessing about causes you cannot confirm.
You may hear two money terms. Actual cash value generally reflects what the existing roof is worth after age and wear. Replacement cost generally reflects the cost of a new roof of like kind, subject to the policy’s definitions, limits, and exclusions. Some replacement cost policies initially pay an actual cash value amount and hold back depreciation until covered work is completed and documented. That holdback is often called recoverable depreciation.
How payment works depends on your coverage. With replacement cost coverage, the insurer may issue an initial payment after applying depreciation and any applicable deductible, then consider the withheld amount after receiving final invoices, photos, or inspection records. An actual cash value policy may not provide a later depreciation payment. Review the policy and the insurer’s written estimate so you know what documents and deadlines apply before work begins.
Plan for any deductible required by your policy. The amount and how it applies depend on the contract and local law, and it should appear in the claim paperwork. If a bidder offers to hide or improperly waive it, walk away. Accurate invoices and payment records protect you if the claim is reviewed later.
Meet the insurance adjuster with your contractor’s notes and photos in hand. Walk through the damage together if your insurer permits it. Point out lifted tabs, missing pieces, bruised spots, and interior stains. Don’t argue or agree to a number on the spot. Ask for the written scope, including measurements and unit prices, so your contractor can compare it line by line.
Settle the scope gap and keep a clean paper file
The first estimates do not always line up. A contractor’s scope may include more roofing area or different work on flashing, underlayment, and drip edge than the adjuster’s scope. Labor rates can differ by area, and hidden deck damage may not appear until tear-off.
Don’t treat a low initial scope as final, and don’t ask the contractor to cut corners with cheap materials. Depending on the insurer’s process, policy terms, and local rules, the contractor may submit additional documentation with photos, measurements, code notes, and material specifications. Decking that is soft, delaminated, moldy, or spongy cannot be roofed over safely. Torn or wrinkled underlayment will not shed water properly. The insurer may consider those items when clear proof shows that covered work requires them.
Keep every document. Save the inspection report, adjuster scope, additional claim correspondence, and invoices. Keep payment receipts, temporary-cover bills, hotel bills, and emails showing claim numbers and dates. Take after photos from the same angles as your before shots. If shingles, vents, gutters, and flashing are replaced, retain a sample label showing the color and brand.
If the claim is denied or appears short, review the insurer’s explanation and your policy. You may be able to request reconsideration or another review, depending on the policy, insurer procedures, and jurisdiction. Send relevant photos and identify any missed slopes or interior rooms. Additional proof may help address gaps, but it does not guarantee that the decision will change.
For a large loss, you may also consider a public adjuster where local law permits one. Check licensing, fees, contract terms, and any cancellation rights before signing. Read the policy for deadlines involving review, appeal, appraisal, or legal action, and seek qualified advice when the process is unclear.
Walk the finished job before you sign off. Check that flashing sits flat in valleys, around chimneys, around vents, and around skylights. Look for straight shingle lines and clean gutters. Ask for warranty papers listing both material and workmanship terms, along with the phone numbers to call if a problem develops.
Once work is done, request the final invoice, warranty papers, proof of final inspection, and any lien waiver or equivalent document appropriate for your jurisdiction. Send the required packet to your insurer so it can evaluate any remaining payment under the policy. File everything where you can find it for resale, warranty service, or the next storm.
Storm work rewards an orderly response. Handle safety, temporary protection, photos, and paperwork in that sequence so you do not give away time or weaken the claim. A sound roof over dry rooms is worth the extra calls.